5 Quick Steps to Track User Events on your Website
Ok, so you want to track what your customers do inside your website or app, and send that customer data to your Marketing Analytics tools (and maybe also reduce your Bounce Rate), so you need to add events to track the actions that really matter to you. Be it a signup for your newsletter, checking out your vídeo or other in-page activities.
So, how do you track in-page events?
THE HARD WAY: Write custom event code:
You can manually add custom code to your web pages to send eventds to Google Analytics whenever a user takes a valuable action. This can be very time consuming, and makes you dependent on engineers. See the [Custom Events guide for Developers](https://developers.google.com/analytics/devguides/collection/analyticsjs/events" target="_blank).
THE EASY WAY: Use a tool to do the hard work:
You can use a tool like [Google Tag Manager](http://www.google.com/tagmanager/" target="_blank) or [Popcorn Metrics point-and-click to track and send customer data to your marketing and analytics tools](http://popcornmetrics.com" target="_blank) to let you add events to your website without you needing to write custom code or depend on engineers.
SIDE NOTE: Remember, you don't have to track "everything". Its up to you to decide what's important to you. If your user clicks on the "pricing" tab, maybe it's an interested user (therefore, not "a Bounce") maybe not. That's for you to decide. For us? We'd track it.
Setting Up Events using Popcorn Metrics
Okay, so you're going to head over to Popcorn Metrics, sign-up for a free trial account and install a one line snippet on your website. (That's the ONE and ONLY time you'll ever need to add event code to your website again. After that - you can Add/Edit/Delete user events tracking at the click of your mouse. Nice, huh?)
Step 1. Get your developer to add a small one time code snippet to your website.
Add a small snippet of code to your website, or click the Send by Email button to email to your developer.

Step 2. Open the Tracker Tool and load your website.
Enter the URL of your website and click Load Page.

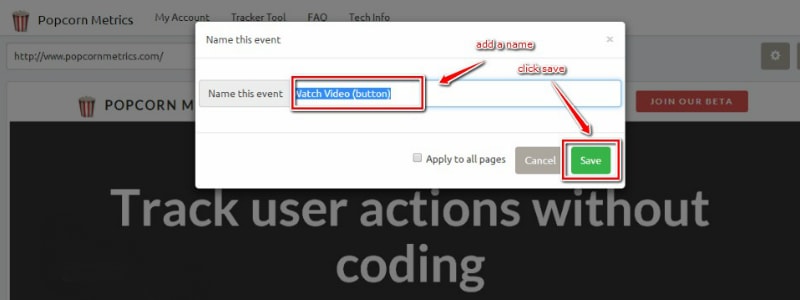
Step 3. Right click to add an event
Right click on the Watch the Video Button, enter a name and click Save.

Step 4. Click Publish
If you havent already selected your destination, and you will be prompted to choose where to send events. Here, I'm choosing to send to Google Analytics, but you can send your events to a growing list of analytics tools.

Step 5. Choose destination, click Publish, and you're done!
It takes around 10mins to publish the event tracking across the internet. I got an email alert as soon as it was ready - after just 10 mins. You'll see that everything that is tracked is marked with a blue border in the tool.

Conclusion: What should you do next?
So, now that you know how to add events and track what people actually do on your website, its time to get to work! After all, your site is only useful if it serves a purpose :)
If you know what you're doing, you can set up events using Google Tag Manager.
And if you want to [get started tracking events on your own website check out our visual tracker tool](http://popcornmetrics.com" target="_blank).